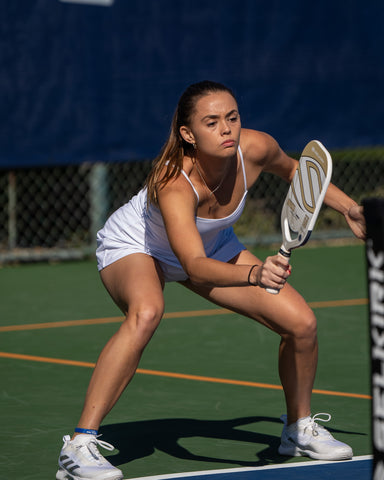
Knee pain is a very common complaint with pickleball players due to the effects of gravity and aging on the joints.
But by understanding the function of the knee and what stresses it, you will be better able to take care of your knees.
The structure and function of the knee
The knee is the largest joint in the human body and is formed by the articulation of the femur and tibia. This joint is contained in a synovial membrane, a thin barrier that lines the inside of some joints, and which permits flexion and extension with slight amounts of rotation.
The knee has two articular surfaces, the medial and lateral condyles, with the patella (kneecap) in the anterior portion. The patella is attached to the tibial tuberosity by the patellar tendon. The condyles are protected from rubbing and shock by articular discs known as menisci, which thin and wear out with age and trauma.
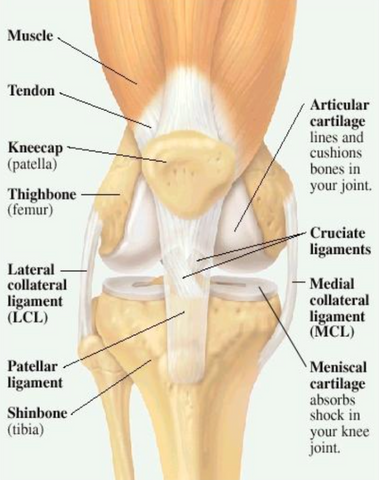
The sides of the knees are stabilized by the medial and collateral ligaments, while forward and backward movement is limited by the anterior and posterior cruciate ligaments. Extension of the knee is facilitated by the quadriceps muscles, while flexion is accomplished by the hamstring muscles.
Causes of knee pain
There are numerous causes of knee pain, the most common being trauma, muscle weakness, imbalance, overuse, and arthritic and degenerative conditions.
Fortunately, the majority of knee problems are minor and can be resolved with rest, therapy, stabilization, rehabilitation, ice, or medication. Persistent or more serious problems may require extended rest, injections, and invasive or surgical intervention.
In aging athletes, a common cause of knee pain is osteoarthritis-degenerative joint disease or wear and tear arthritis. Unfortunately, this is an inevitable part of the aging process and the symptoms of this problem begin to appear as you reach middle age.
The symptoms of osteoarthritis include:
- Pain and stiffness associated with movement or exercise;
- Grating, rubbing, or a crackling sound with movement known as crepitus;
- Morning pain and stiffness that usually improves with mild activity and time; and
- Tenderness and swelling around the joint with a painful and limited range of motion.
Degenerative changes can be exacerbated or initiated by being overweight, long-term overuse, excessive weight bearing, and unlucky genetics.
Preventing knee problems: Strengthen and stabilize the knee
The best way to prevent knee problems is by strengthening and stabilizing the knees with exercises that focus on the hamstring and quadriceps muscle groups.
The quadriceps consist of four muscles in the front of the thigh, while the hamstrings are three muscles in the back of the thigh. These two muscle groups are responsible for supporting and stabilizing the knee.
The following exercises are designed to strengthen and stabilize these two muscle groups.
Exercise 1: Step-ups
This exercise is for strengthening the quadriceps muscle group. Begin by standing in front of a step or yoga block.
Place your right foot in the middle of the step and push up through your right leg to bring your body weight onto the block. Balance your entire body weight on your right leg for one to two seconds.
Your left leg should be stretched behind your body to help stabilize your weight as it is shifting. Then, step down with your left leg first, followed by your right, to return to your starting position.
Aim to complete three sets of 12-15 repetitions on each leg.
Exercise 2: Leg extensions
This exercise is used to strengthen the quadriceps muscle group. For maximum efficiency, this exercise should be done one leg at a time because it allows for better isolation and prevents the dominant leg from doing an unequal amount of the work.
Sit comfortably on the padded seat of a leg extension machine with your back firmly against the back pad. Adjust the machine so that the front pad comfortably contacts the front of the foot and ankle.
Start with light weights that allow you to extend the leg with moderate resistance and slowly increase the amount of weight as you develop more strength.
Holding your head steady, grip the bars firmly at each side. Slowly lift your legs to hip height and slowly lower back down.
Exhale as you lift your legs and inhale as you lower. Aim to complete three sets of 15-20 repetitions on each leg.
Exercise 3: Squats
Squats are primarily used to strengthen the quadriceps muscle group. These can be done with free weights or with the barbell in a squat rack. Initially, this exercise should be performed inside a squat rack for safety purposes with light weights until you develop more confidence and strength.
Stand with your feet hip- or shoulder-width apart. Place the barbell just above the shoulders on the trapezius muscles (or the “bulky” part of the shoulders). If you feel uncomfortable, use a bar pad or towel to protect your back.
Gently bend your knees and lower into a squat position, stopping just before your knees are at a 90-degree angle to the floor or before you lose the natural arch of your back. Make sure you are facing forward with your feet straight and your weight on your heels.
Then, squeezing through your glutes and legs, slowly stand back up, being careful not to lock your knees at the top of the motion. Aim to complete three sets of 15-20 repetitions.
Use caution when doing this exercise for the first time. Start with a lighter weight that you can easily handle and focus on getting your form perfect before moving on to heavier weights.
Exercise 4: Hamstring curls
This exercise is used to strengthen the hamstring and gluteal muscle groups. Set a leg curl machine to fit your height and lie face down with the pad of the lever comfortably on the back of your legs, just below the calf muscles.
It is recommended to do each leg individually to obtain better isolation. It is preferable to use a leg curl machine that is angled as opposed to flat since an angled position is more favorable for hamstring recruitment.
Keeping your torso flat on the bench, and while gripping the side handles, stretch your legs fully. As you exhale, curl your leg up toward your body as far as possible without lifting your upper leg or body from the pad.
Hold the position for a few seconds. Inhale as you lower your leg to the starting position. Start with light weights to perfect the technique and avoid injuring the hamstrings or lower back.
Aim to complete three sets of 15-20 repetitions.
Exercise 5: Leg press
This exercise primarily strengthens the quadriceps and hamstring muscle groups, but does have some partial benefit to the calf muscles.
Using a leg press machine, sit down on the machine and place your feet shoulder-width apart directly in front of you on the platform. Slowly and carefully lower the safety bars, holding the weighted platform in place with your legs.
Exhale and press the platform away from your body up until your legs are fully extended in front of you. Be careful to not lock your knees. Your upper body and legs should make a perfect 90-degree angle. As you inhale, slowly lower the platform to the starting position.
Focus on pushing with the ball of your foot and using your quadriceps to return to the starting position as you exhale. Perform three sets of 20-25 repetitions starting with moderate weight and slowly increasing as your strength and stability improve.
Exercise 6: Dumbbell lunges
This exercise strengthens the quadriceps, hamstring, and gluteal muscles. When you start, complete the exercise without weights to perfect the technique. As you get comfortable, add light weights and work up your strength.
Pick up a pair of dumbbells and hold them loosely on either side. While standing upright with your feet shoulder-width apart, lunge your right leg forward in a stepping motion until your knee joint forms a 90-degree angle.
Your right thigh should be parallel to the floor your left leg from the knee to the hip should be straight up and down. Your left knee should almost be touching the floor.
Squeeze your right leg muscles, exhale, and return to the standing starting position. Repeat the exercise starting with your left leg.
Aim to complete three sets of 20-25 repetitions on each leg, depending on your fitness level.
Assessing, treating, and recovering from knee pain
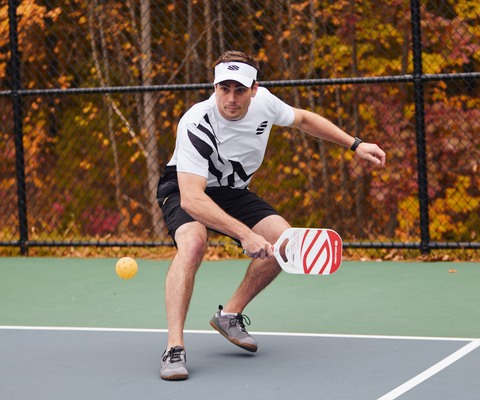
Knee pain generally develops slowly and is usually precipitated by trauma, overuse injuries, or a change in the exercise regimen. Athletes tend to exacerbate an injury by hesitating to take time off for fear of losing skill and fitness.
When an injury occurs, it is important to take a few days off from playing and begin a care regimen of topical/oral analgesics, compression, elevation, and frequent ice application.
NSAIDS (non-steroidal anti-inflammatory drugs, such as Ibuprofen, Naproxyn, and Aspirin) help reduce pain, inflammation, and swelling. Athletes with a history of ulcers or GI problems should consider using Tylenol or Acetaminophen. The application several times daily of topical analgesics such as Capsaicin, bio-Freeze, or Cryoderm is another effective way to help reduce pain, swelling, and inflammation.
If you experience swelling, elevate your knee on pillows and wrap the area in an elastic or bandage while applying ice.
To reduce pain, inflammation, and swelling apply ice or a cold pack to the area for 10-20 minutes, three to five times a day. Wrap the pack in a cloth or paper towel to prevent direct contact with the skin.
If the pain and swelling have decreased after two to three days, begin applying heat several times a day for 10-20 minutes.
At this point, you can begin to do easy workouts, such as walking, swimming, using the elliptical, or cycling before making a gradual return to pickleball. After a week, or if the pain has subsided, you can return to your normal playing regimen.
If the pain persists for more than two to three weeks or returns after rest and other conservative treatment, it is time to visit a qualified healthcare professional for diagnosis and treatment.


